

Chicken Coop Layouts That Are Easy to Clean
Short Answer
The easiest chicken coop to clean has full-height access, removable droppings boards, reachable corners, smooth sealed surfaces, removable perches and a dry route for removing litter. Design cleaning access before fixing nest boxes and partitions in place.
Key Takeaways
- Prioritise dry shelter, ventilation, hygiene, security and enough usable space.
- UK rainfall, wind, drainage and predator pressure should shape the setup.
- Inspect the flock and housing daily for changes in health, behaviour or damage.
- Avoid dusty, damp, sharp, toxic or difficult-to-clean materials.
- Check current local rules and seek veterinary advice for illness or welfare concerns.
Quick Decision Checklist
| Check | What good looks like |
|---|---|
| Dryness | No persistent leaks, pooling water or damp bedding |
| Ventilation | Fresh air above bird level without a direct draught |
| Security | No gaps, weak latches or exposed digging edges |
| Hygiene | Surfaces and fittings can be inspected and cleaned |
| Flock behaviour | Birds can feed, drink, rest and move without crowding |
Why Layout Matters More Than Size
A common assumption is that a larger coop is automatically easier to clean. In practice, a large coop with poor access points and awkward internal fittings can take far longer to clean than a smaller, well-designed one. What determines cleaning effort is not square footage but accessibility - how easily you can reach every surface that needs attention, remove what needs removing, and replace what needs replacing.
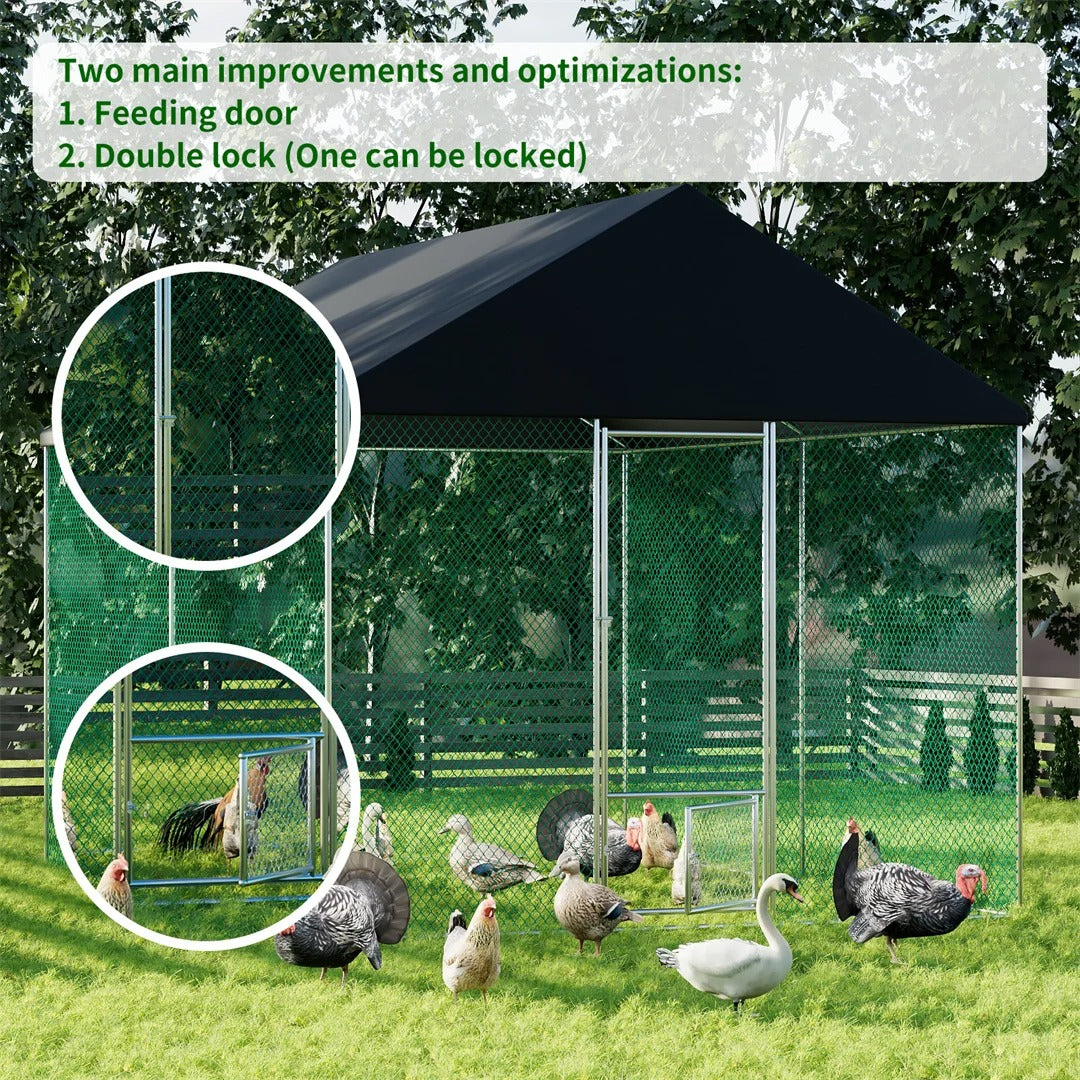
The features that make the biggest practical difference are consistent regardless of coop size: access doors, droppings boards, interior surface finish, roosting bar design, and nest box configuration. Getting these right means cleaning takes minutes rather than an hour. Getting them wrong means every session is a frustrating chore.
Feature 1: The Droppings Board
If there is one single feature that has the greatest impact on coop cleanliness and cleaning effort, it is a well-positioned droppings board beneath the roosting bars.
Chickens produce the majority of their droppings at night while roosting. A droppings board - a flat, smooth surface positioned directly below the roosting bars - catches this output and concentrates it in one place. Scraped clean each morning, it takes under a minute and dramatically reduces the build-up of ammonia inside the coop overnight.
Without a droppings board, overnight waste falls directly into the floor bedding, accelerating how quickly it becomes saturated and foul-smelling. The bedding then needs changing far more frequently, and the ammonia load is higher even between changes.
For a droppings board to work well, it needs to be removable or at least fully accessible for scraping. A fixed board that requires awkward reaching is less useful than a sliding tray that can be pulled out, scraped over a bin or compost heap, and slid back in. Some purpose-built coops include pull-out metal or plastic-lined droppings trays as a standard feature - these are worth prioritising when comparing options.
Feature 2: Access Doors and Openings
How you physically get into the coop to clean it is one of the most practically important layout decisions and one that is very difficult to change after the fact.
Full-height access doors that allow a person to stand upright inside, or at least enter without significant stooping, make a substantial difference to how long cleaning takes and how much strain it puts on your back. Walk-in coops, or coops with a full-height door on one side, are far more pleasant to work in than those requiring you to crouch or crawl.
Wide side-opening panels on smaller coops serve a similar purpose. A panel that swings open to expose the full width of the coop floor and roosting area allows you to scrape, re-bed, and wipe down surfaces from outside without needing to enter at all. This is particularly useful on compact coops where internal access is restricted.
Roof access - either a hinged roof section that lifts or a removable roof panel - is another practical option for smaller coops. It gives unobstructed top-down access to the interior, which makes reaching every corner straightforward. The limitation is that this approach is less practical in rain, and a heavy roof section can be unwieldy to manage alone.
Avoid small hatches and trapdoor-style access points as the primary cleaning entry point. They are secure and minimise heat loss, but they make cleaning significantly more difficult by limiting what you can reach and how you can manoeuvre tools inside. If a coop only has a small pop hole and one small human access hatch, cleaning will always be more laborious than it needs to be.
Feature 3: Smooth Interior Surfaces
The interior finish of a coop affects both cleaning speed and parasite management. Rough, unplaned timber with visible gaps between boards takes longer to wipe down, traps debris in the grain and joints, and - critically - provides ideal harbourage for red mites, which shelter in cracks and crevices during the day and feed on birds at night.
Smooth, planed interior surfaces are faster to clean and less hospitable to mites. Some keepers apply a coat of non-toxic exterior paint or varnish to interior walls and the underside of the roof, which creates a wipeable surface that is easy to disinfect during deep cleans. This is a worthwhile investment of time during the initial setup or renovation of a coop.
Joins between wall panels, the wall-to-floor junction, and the area around roosting bar brackets are the most important areas to seal and smooth. These are where mite populations typically concentrate. A bead of non-toxic exterior sealant along any significant gaps at these points reduces both the cleaning difficulty and the parasite risk.
For a deeper understanding of how mite pressure relates to coop design and why this matters for ongoing management, our guide on identifying and treating red mite infestations in backyard coops is useful background reading.
Feature 4: Roosting Bar Design and Placement
Roosting bars that are easy to remove make cleaning significantly faster. Fixed bars screwed permanently into the wall require cleaning in place, which means working around them with a scraper and brush. Removable bars - resting in notched supports or on simple brackets - can be lifted out, taken outside, and scrubbed properly before being replaced.
Bar placement affects how the droppings board works. Roosting bars should be positioned directly above the droppings board with enough clearance that droppings fall onto the board rather than onto the wall behind or the floor in front. A consistent height of around 30-40cm above the board tends to work well for most common UK breeds.
Multiple bar heights in a stepped arrangement allow a flock to establish their preferred roosting hierarchy while keeping the drop zone concentrated above a single board. A two-tier stepped arrangement with bars at different heights but positioned above the same board is a practical layout that suits the natural behaviour of most flocks.
Feature 5: Nest Box Position and Access
Nest boxes that are accessible from outside the coop via an external egg collection hatch reduce how often you need to enter the coop for routine tasks. They also allow nest box bedding to be checked and topped up without disturbing the rest of the interior.
From a cleaning perspective, nest boxes benefit from a removable or hinged floor liner that can be lifted out and replaced quickly. A fixed floor covered in permanently attached bedding is harder to sanitise than a removable tray lined with fresh material that can be swapped out in seconds.
Nest boxes should be positioned lower than the roosting bars to discourage birds from sleeping in them overnight, which would mean additional droppings to manage. A divider or slight lip at the front of each box keeps bedding contained and reduces how much spills onto the coop floor.
Feature 6: Floor Design and Substrate Management
The floor of the coop has a significant impact on cleaning frequency and effort. The key considerations are what the floor is made of, whether it is raised off the ground, and what substrate is used on top of it.
Raised floors with a gap between the coop base and the ground reduce moisture ingress from below, improve air circulation underneath, and deter rats from nesting directly beneath the structure. A raised floor stays drier than one sitting flush on the ground, which means bedding lasts longer before needing replacement.
Solid, smooth floors - whether timber, metal, or plastic-lined - are easier to scrape clean than bare earth or rough concrete. Some keepers use a removable plastic or metal floor liner that can be slid out during deep cleans for hosing off outside the coop.
Floor substrate choice affects both cleaning frequency and composting outcomes. For guidance on the specific properties of different run and coop floor materials - including the practical differences between sand, straw, and wood shavings - our post on choosing the right floor covering for your chicken run and coop covers the options in detail.
Feature 7: Run Design for Low-Maintenance Management
The cleaning effort associated with a coop extends to the attached run, which is often overlooked when thinking about layout. A run that becomes muddy and waterlogged quickly creates a hygiene problem that works its way back into the coop on the birds' feet.
A covered run - either with a solid roof or a waterproof cover over at least part of the structure - stays drier in the UK's frequently wet climate and reduces how quickly the ground surface degrades. A run with a solid or semi-solid floor covering (such as paving slabs, compacted hardcore, or a deep layer of wood chips) is easier to manage than bare earth, which turns to mud in wet weather and harbours pathogens and parasite eggs in the soil over time.
The run should also have at least one wide gate or access point that allows a wheelbarrow to enter for clearing out spent substrate during deeper clean sessions. A run with only a small pop hole entry point is awkward to manage when it needs a full clear-out.
Choosing a Coop with Cleaning in Mind
When evaluating ready-built coops, it is worth running through a simple mental checklist against the features above. Can you access the full interior without crawling? Is there a droppings board or tray? Are the interior surfaces smooth? Can the roosting bars be removed? Is there external nest box access?
Our range of backyard chicken coops includes options designed with practical maintenance in mind. The outdoor extra tall chicken coop pen for UK gardens and allotments provides good internal height that makes cleaning without stooping considerably more manageable, while the large outdoor metal walk-in chicken coop with covered run offers a fully walk-in structure with a covered run - making both the coop and the run area far easier to maintain in UK conditions.
For keepers who want to define a clean, well-managed outdoor run area with flexible boundaries, the heavy duty iron garden fence panels offer a sturdy, reconfigurable option for creating defined zones that can be rotated and managed separately.
Putting It All Together: Layouts That Work
The layouts that consistently make cleaning easiest share a few common characteristics. They have a clear, accessible entry point for the person doing the cleaning. They concentrate the dirtiest output - overnight droppings - in one removable or easily scraped location. They use smooth internal surfaces that can be wiped and disinfected efficiently. And they have a run that stays reasonably dry and can be cleared without awkward access restrictions.
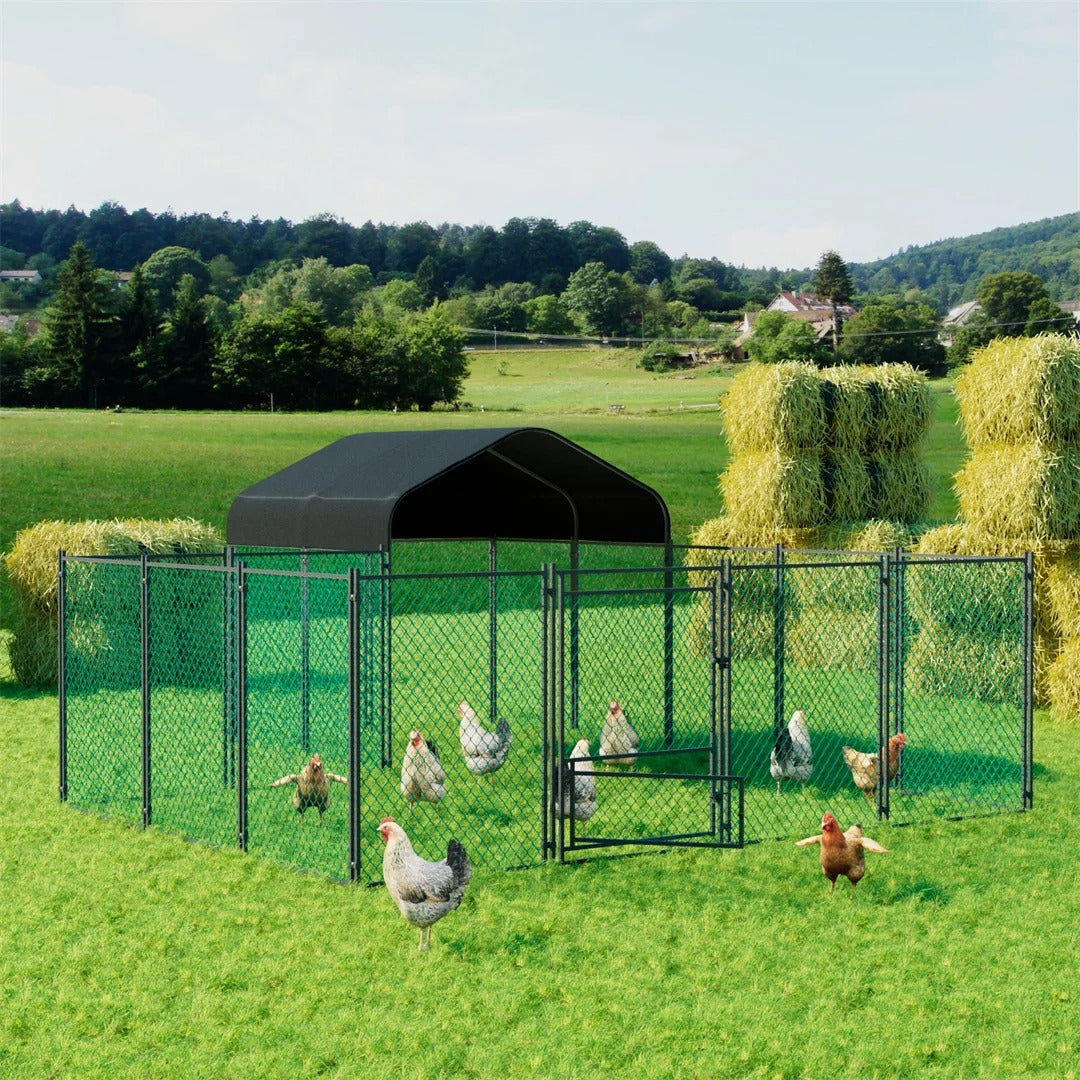
A walk-in coop with a pull-out droppings tray, removable roosting bars, smooth painted walls, and a covered run with wide gate access represents the layout that comes closest to making coop maintenance genuinely quick and straightforward. Not every keeper needs or has space for this configuration, but each individual feature can be incorporated into smaller designs without significant additional cost or complexity.
For those planning a build from scratch and wanting to understand what the complete setup should include beyond just the cleaning features, our overview of what a well-equipped chicken coop needs to function properly covers the full picture.
Final Thoughts
Coop cleaning is one of those tasks that is easy to make much harder than it needs to be. The design decisions made at the start - access points, droppings boards, surface finish, roosting bar configuration - compound over time. A coop that takes 10 minutes to clean rather than 40 minutes makes a real difference across weeks and years of keeping.
If you have questions about which coop layout would suit your flock size and garden, or want advice on any of the products in our range, the Paw Comfort team is happy to help. Get in touch with us here and we will point you in the right direction.
Final Verdict
The easiest chicken coop to clean has full-height access, removable droppings boards, reachable corners, smooth sealed surfaces, removable perches and a dry route for removing litter. Design cleaning access before fixing nest boxes and partitions in place.
FAQ
Why Layout Matters More Than Size?
A common assumption is that a larger coop is automatically easier to clean. In practice, a large coop with poor access points and awkward internal fittings can take far longer to clean than a smaller, well-designed one. What determines cleaning effort is not square footage but accessibility - how easily you can reach every surface that needs attention,…
What should you know about feature 1: the droppings board?
If there is one single feature that has the greatest impact on coop cleanliness and cleaning effort, it is a well-positioned droppings board beneath the roosting bars.
What should you know about feature 2: access doors and openings?
How you physically get into the coop to clean it is one of the most practically important layout decisions and one that is very difficult to change after the fact.
What should you know about feature 3: smooth interior surfaces?
The interior finish of a coop affects both cleaning speed and parasite management. Rough, unplaned timber with visible gaps between boards takes longer to wipe down, traps debris in the grain and joints, and - critically - provides ideal harbourage for red mites, which shelter in cracks and crevices during the day and feed on birds at night.
What should you know about feature 4: roosting bar design and placement?
Roosting bars that are easy to remove make cleaning significantly faster. Fixed bars screwed permanently into the wall require cleaning in place, which means working around them with a scraper and brush. Removable bars - resting in notched supports or on simple brackets - can be lifted out, taken outside, and scrubbed properly before being replaced.
What should you know about feature 5: nest box position and access?
Nest boxes that are accessible from outside the coop via an external egg collection hatch reduce how often you need to enter the coop for routine tasks. They also allow nest box bedding to be checked and topped up without disturbing the rest of the interior.